“Binders Keeper” tool roll
This is the basic version. The outside could be made of pieced fabrics, and the pocket edges could be bound with different fabrics, rather than hemmed.
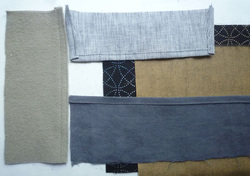
Cutting

Cut two rectangles 20cm x 30cm, from the same or different fabrics - cotton or linen is good.
For the inside, cut a tall pocket 20cm x 10cm (I use wool, for putting needles into); a flap 20cm x 7cm; a long pocket 30cm x 10cm.
You’ll also need a ribbon 60cm long (this could be made from a 4cm wide strip of thin fabric).
For the inside, cut a tall pocket 20cm x 10cm (I use wool, for putting needles into); a flap 20cm x 7cm; a long pocket 30cm x 10cm.
You’ll also need a ribbon 60cm long (this could be made from a 4cm wide strip of thin fabric).
Sewing
1. Hem the long side of the tall pocket and the long pocket – turn the fabric 0.5cm and then 1cm and stitch down.
2. Hem three sides of the flap. You may wish to do the short sides at an angle.
2. Hem three sides of the flap. You may wish to do the short sides at an angle.
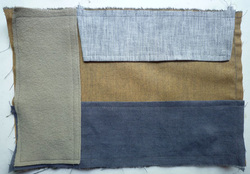
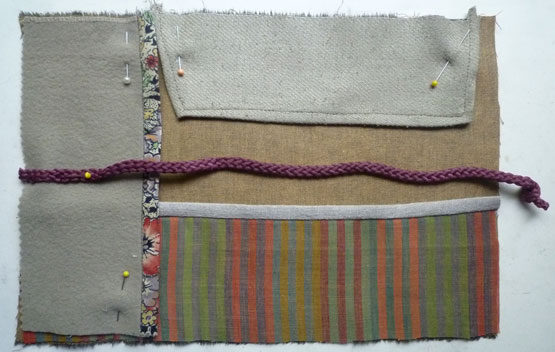
3. Pin the long pocket along the bottom edge, the tall pocket on the left side, and the flap in the remaining space on the top of one of the rectangles. All right sides will be up.
4. Sew all around, 0.5 cm from the edge.
4. Sew all around, 0.5 cm from the edge.
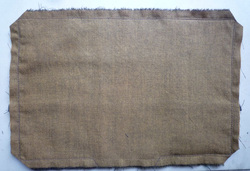
5. Place the other rectangle (the outside fabric) on top so that right sides are together. Sew together just inside the previous stitching line.
Important: leave a gap (on the bottom edge) of 8-10cm so that you can turn it right side out.
6. Clip the corners and turn inside out.
Important: leave a gap (on the bottom edge) of 8-10cm so that you can turn it right side out.
6. Clip the corners and turn inside out.
7. Press carefully, then pin or baste (or hand-sew) the gap closed.
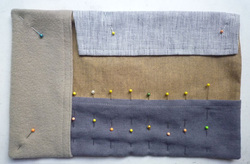
8. To mark little pockets for your tools on the long pocket, first decide how the tools will lie, then pin the fabric either side, making a snug but not tight pocket. Do the pinning one tool at a time. Put one pin vertically at the top of the pocket and another below it, so that they form the line you’ll be stitching.
The markings I use are 4.5cm from the right edge, then 2.2 cm for the other pockets. This is based on the width of my bone folder, but you may have other

9.Topstitch around the edge (the flap should be lying on the fabric). I start at the left side of the flap. When you come to the pins marking the little pockets, stitch along the line made by the pins (removing pins as you go!) to the top of the pocket, then turn around and stitch to the bottom of the pocket; continue along the edge, then repeat for each subsequent little pocket.
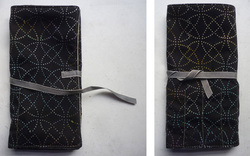
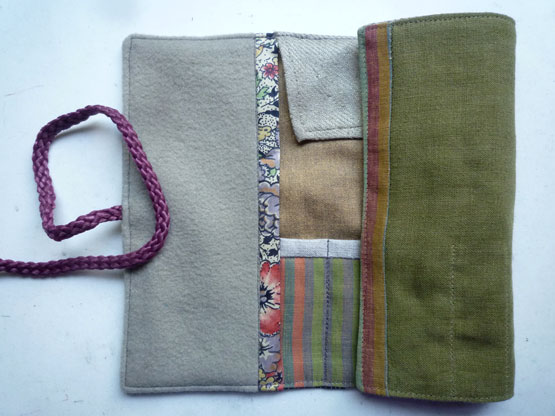
10. To finish, attach the ribbon to the centre of the edge where the tall pocket is top-stitched, or add a button-and-loop closure if you prefer.
The ribbon in the photo is 35 cm long ,and loops around to the back; a 60cm ribbon will loop round twice.
The ribbon in the photo is 35 cm long ,and loops around to the back; a 60cm ribbon will loop round twice.
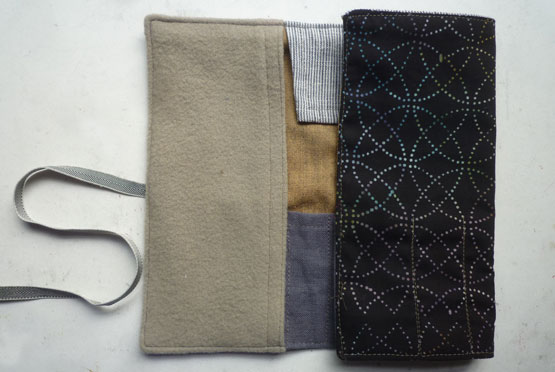
Variations
1. Piece the outside fabric.
2. Add the ribbon in step 5, so it's held by the seam (and later by the topstitching).
3. Bind, rather than hem, the pocket edges.
1. Piece the outside fabric.
2. Add the ribbon in step 5, so it's held by the seam (and later by the topstitching).
3. Bind, rather than hem, the pocket edges.